Access the Admixture Queue
Use the Admixture queue to create plans for preparation of Treatments based on the patient's regimen and medication orders.
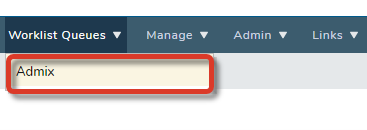
To manage the in-house medications ordered for all patients, including regimen and non-regimen orders, select Admix from the Worklist Queues menu.
View the Admixture Queue
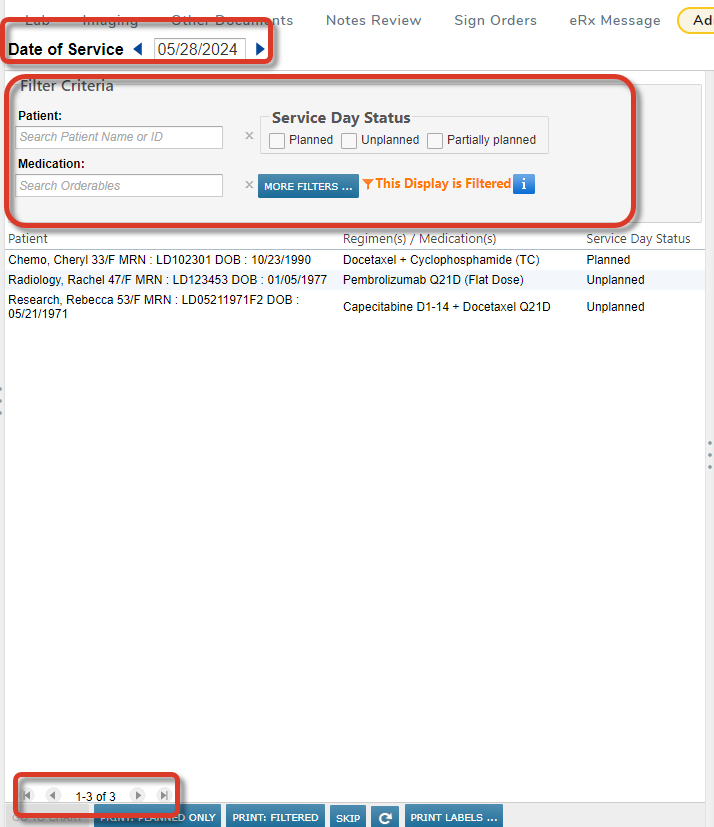
The Admix queue contains a list of patient medication orders for a specific Date of Service.
Today's date is selected by default. To change the date, use the arrows or click in the Date of Service field.
Use the search fields under Filter Criteria to filter the displayed list by Patient and/or Medication.
Use the checkboxes to display only patient treatments with a specific Service Day Status (i.e., Planned, Unplanned, or Partially planned) for the date specified.
Click MORE FILTERS to view and select additional filters.
Appointment
Appointment Locations
Treatment Day Approved
Ordered Locations
Admin Record Charted
Clinicians
Labels Printed
Skipped Records
Select a Patient
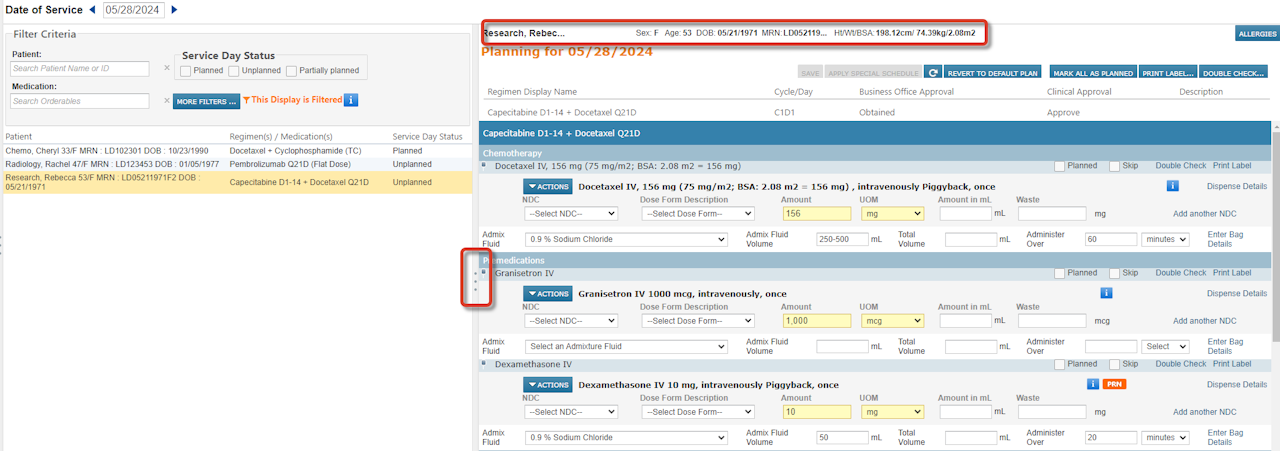
Select a patient in the queue to open their orders in the Admix Planning panel on the right side of the screen.
Additional patient information, such as height, weight, and BSA, is displayed at the top of the admix pane.
To move the separator bar and resize the panes in the application, "grab" the bar on the three dots and drag it to the desired position. To quickly expand the Planning panel, hover over the three dots and click the arrows that appear.
View the Admix Planning Pane
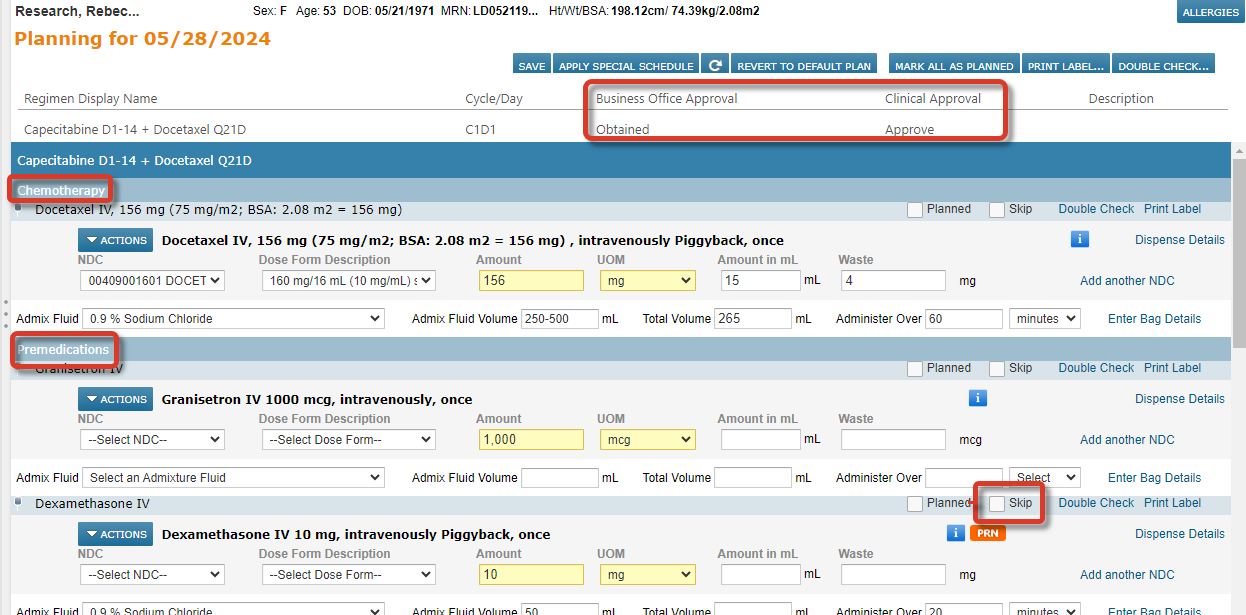
Before you begin any admixture, check the Business Office Approval and Clinical Approval for the treatment.
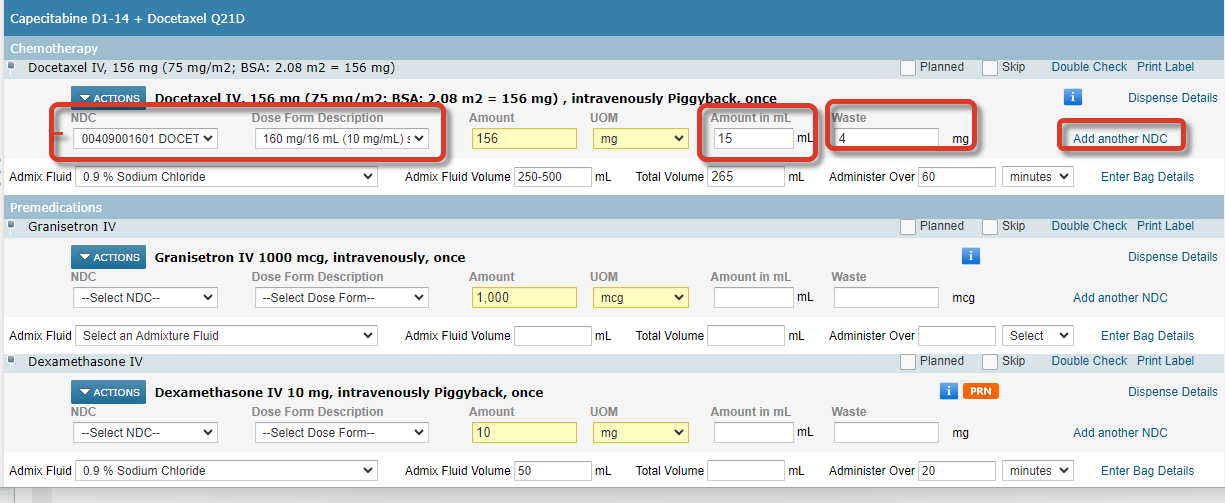
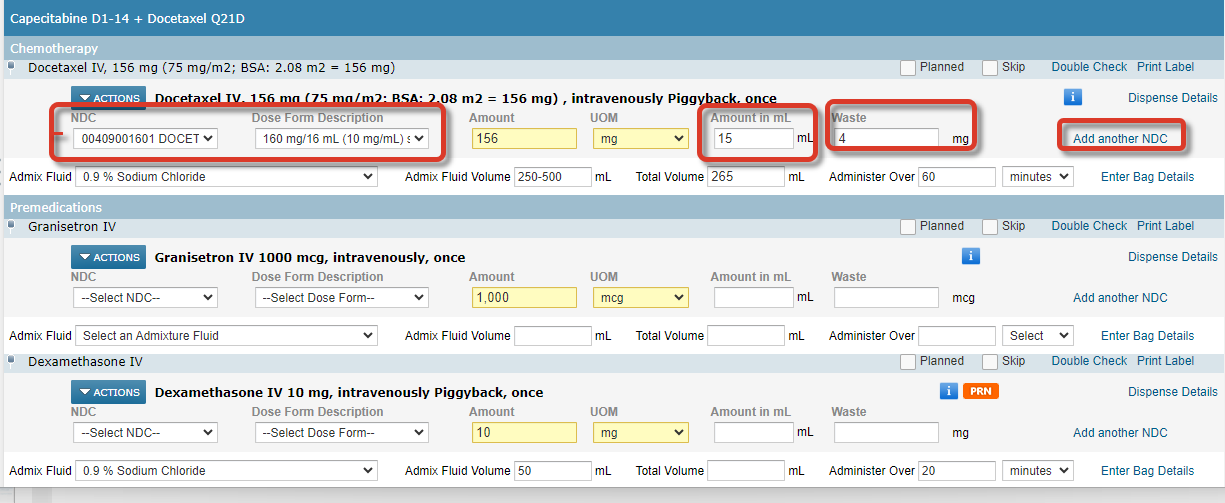
The information specified in the order is captured in the Admix Planning area. Any additional information necessary to complete the admixture process must be entered in this area as well.
In the Admix Planning area, medications in the regimen are listed in Treatment Groups, such as Chemotherapy, Premedications, and PRN medications.
Check the box to Skip a medication for the cycle date. Skipped drugs are not marked Planned and are omitted from the list of drugs for the patient on the selected Date of Service.
Choose an NDC
To make sure the appropriate drug billing code is selected, used the drop-down list to choose the NDC to be given.
If the NDC is selected, the dose form is populated in the Dose Form Description field. Alternatively, select a dose form in the field to filter the NDC list to match your criteria.
Select Fluid Details
Select the fluid used for the treatment from the Admix Fluid drop-down list.
Enter the amount in mL in the Admix Fluid Volume field.
Enter the Total Volume (Amount in mL plus Admix Fluid Volume).
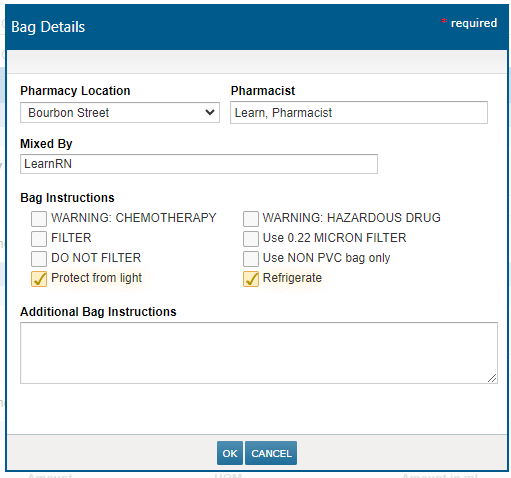
Click Enter Bag Details to add any additional instructions. These instructions are displayed on the printed label.
Enter Bag Details
Bag Details are available to select and you can use free text to enter Additional Bag Instructions.
Once instructions are saved, the option will change to View Bag Details indicating the information for this medication has been entered.
View Dispensing Details
Click the icon to open a window that displays other medication details.
Click SAVE to update the unplanned treatment with entered information.
Click Dispense Details to open a window that shows the dispense information entered in Lynx Mobile. Information displayed includes dispensed NDCs, Waste, Lot Numbers and Expiration Dates.
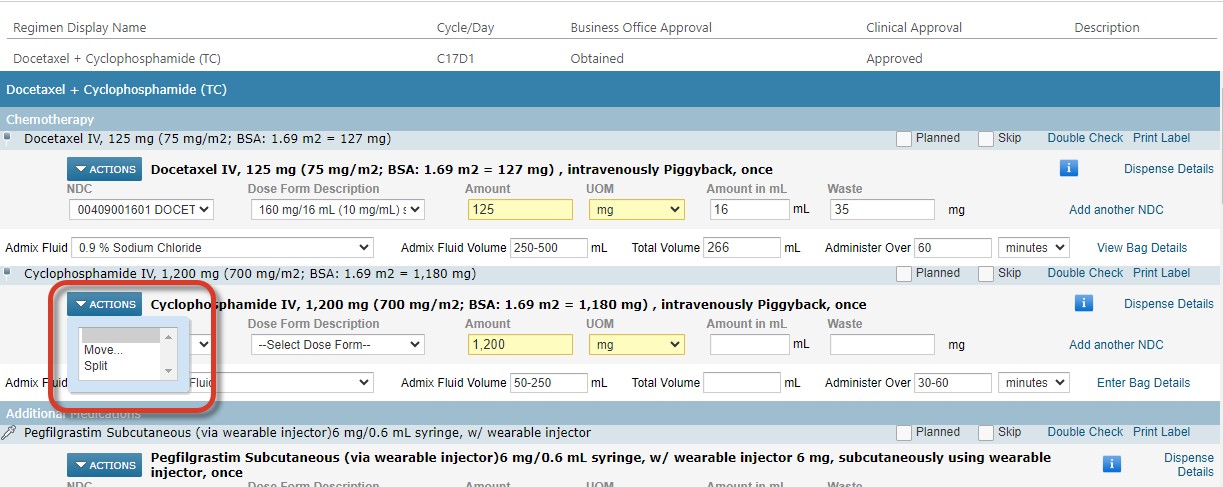
Combine, Move, or Split a Medication
Clicking the ACTIONS menu allows you to Combine, Move or Split medications within a treatment.
Clicking Actions > Move allows you to combine multiple medications within a single treatment. You can also create a new treatment.
Move a Medication
In this example, Palonosetron and Dexamethasone will be administered in a single IV bag.
Select Actions > Move next to the drug Palonosetron. Selecting the radio button to the left of the destination treatment and then clicking MOVE will complete the action.
If the medication needs to be moved into a different Treatment Group, select the New Treatment radio button.
The medication has been moved to the destination treatment and updated to be delivered using the same Admix Fluid and Volume.
Split a Medication
The Split option allows you to split a single dose into two treatments that can be administered in two bags/syringes at different times.
The Split action will:
Create a second treatment for the medication.
Divide the dose equally. You can manually change the split amounts.
Duplicate the fluid, volume and other order details which can be modified if needed.
The new treatments are noted as (# of Total #) to indicate they are the result of a Split action.
Combine a Medication
To reverse the Split action, clicking Actions > Combine restores the original order details.
Mark All as Planned
Once all admixture details are entered, you can select the Planned checkbox for an individual treatment to indicate the Admix is complete.
Alternatively, the planning can be marked for all treatments at once using the MARK ALL AS PLANNED button.
After marking treatments as Planned, clicking SAVE applies the admix plan to this and all future days. If a different schedule is desired, click the Apply Special Schedule button.
If the label has been printed, the Print Label link will now display as Printed Label with a checkmark. This will not prevent you from printing the label again if needed.
Apply Special Schedule
Click the APPLY SPECIAL SCHEDULE button to make the selection to Apply Admix Plans to Future Cycle Days.
The options are:
This day only
This day and all future cycle days
This day and same day in all future cycles
Make Button Selections
Clicking the refresh icon updates the Admix area with any recently ordered treatments.
The REVERT TO DEFAULT PLAN button removes all data and actions taken and returns the medications to their original state.
Clicking the Print Label button gives you the option to print labels for multiple medications on the selected date.
Use the DOUBLE CHECK function allows another user to confirm the planned admixture prior to providing the treatment to the patient.
Go to Chart
While working in Admix, to open the Admix tab in the selected patient's chart, click GO TO CHART.
In the patient's Admix Planning area, view treatments by Treatment Status or by a specific date range.
By default, all Unplanned treatments are listed.
Print Admixture Report and Labels
Use the date widget to view all patients with medication orders for a specific Date of Service. Check Planned to display only patients with Planned treatments for the selected date.
Use the PRINT buttons to generate the Admixture Report. This report includes all patients and orders that match the selected filter criteria.
You can print labels for an entire treatment, a single medication and/or to print labels for multiple patients at once,. Customize the list of patients using the filter options, then click the PRINT LABELS button in the Planning Panel to print for more than one patient.
To print labels for multiple medications on the selected date, click the Print Label button. Click the Print Label link to generate a label for a single medication.
View Labels
When printing for multiple patients, use the checkboxes to add or remove the medication labels to be printed. Labels are printed alphabetically by patient.
The total number of labels selected to be printed is displayed at the bottom of the Print patient admix labels window.